Getting started with Google Search Console – a complete guide to adding your site
Google Search Console – previously known as Google Webmaster Tools – is an important tool for every website owner or administrator. We recommend all our clients – even those with very simple websites – add their site to Google Search Console. It is a free tool provided by Google.
Once your site is added, Google will start feeding data into your account so you can see an overview of the technical health of your website. You can help Google to understand more about your site, your content and who you are targeting. Google can advise you of problems it is having crawling your site or fetching your pages.
Google will send you email notifications if it finds problems or issues with your site.
In later articles we will cover the configuration options and recommended settings, but in this post we will concentrate on step 1 – adding your site to Google Search Console.
Adding your site to Google Search Console
Google Search Console is very powerful. Changing the configuration options can have a major impact on how your site is indexed and how it appears in search results. Therefore, Google must be sure that you are authorised to add and maintain these settings on behalf of your website.
This authorisation process is called verifying your site ownership.
Go to the Google Search Console site https://www.google.com/webmasters/tools and sign in with the Google account you use for other Google services such as Google Analytics.
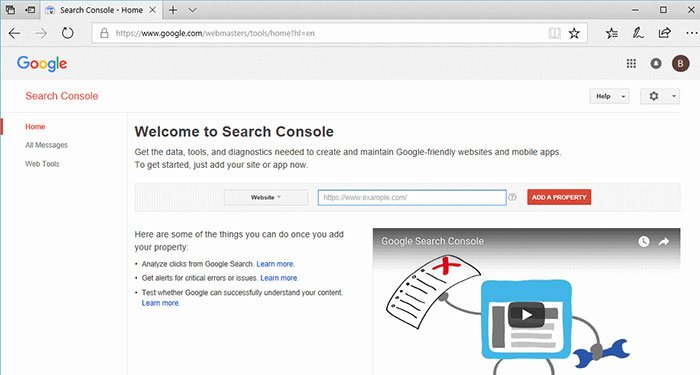
Enter your full website address into the entry box and click [Add a Property].
Tip: Your full website address should be entered exactly as it appears in Google with the protocol (http or https) and the sub-domain if it exists, e.g. www. You may have:
- http://www.mywebsite.com
- https://www.mywebsite.com
- http://mywebsite.com
- https://mywebsite.com
All of these are considered different websites.
Verifying your Ownership
Google gives you 5 options to prove you are the owner / administrator of the site you’ve added. You only need to use one of these methods to verify your site.
- HTML file upload
- HTML tag
- Domain name provider
- Google Analytics
- Google Tag Manager
Google offers a recommended method for you, but often one of the alternate methods will be simpler for you.
Below we explain each of the 5 options and the process you need to follow to use that method to verify your site.
Option 1 – HTML file upload
With this method you are required to upload a small file to your website hosting environment.
You will need to have FTP access to your website hosting environment or if your website host provides you with a control panel such as cPanel or Plesk you will be able to upload the file using the File Manager application provided.

Download the file by clicking on the link in step 1. Save the file to your your Desktop or Documents folder.
Use your FTP application to upload the file to the public_html or www directory within your hosting environment.

Finally click on the link shown in step 3 within Google Search Console to confirm that Google has successfully found the uploaded file. Your site is now verified.
Option 2 – HTML tag
With this method you are required to add a meta tag to your website home page.
You will need to have the ability and permissions to access your website HTML code or, if your website is based on a Content Management System (CMS), then you are likely to have an option to add the Google Search Console tag into the SEO settings section.

Copy the text (meta tag) directly from the page and paste it into your homepage HTML directly beneath the <head> section as per the example below.

If you use a CMS like WordPress you should check whether you have an SEO plugin installed. Most of the popular plugins allow you to enter the meta tag information so that you don’t need to enter the HTML code directly.
In the example below we are using the most popular SEO plugin for WordPress – Yoast . Go to the Webmaster Tools tab and enter the meta tag. You can copy and paste the complete meta tag. Yoast will automatically strip out the content section it needs.

Option 3 – Domain Name Provider
If you have access to your domain registrar – normally the website where you purchased your domain name from – then you may be able to use this method to verify your site ownership.
Your domain name provider will usually be the place where your DNS (Domain Name System) is managed. To use this method you will add a TXT record to your DNS.
If you are not confident with making changes to your DNS you may prefer to consider some of the alternate site verification options. Making a mistake with your DNS can have major consequences for your website and email.
In Google Search Console you will see a list of the most popular domain registrars. If you find your registrar then follow the specific instructions for updating your TXT record. If your registrar is not listed select the Other option.
- Log in to your domain name provider
- Select the domain name you are adding to Google Search Console
- Normally you will find a section called DNS or Advanced DNS
- Find the option for Add TXT record
- Copy/Paste the Google Site Verification content into the TXT value field
- If you are asked to enter a host name leave this blank

Once you have completed the steps you can return to Google Search Console and click Verify. Be aware that it can take several hours for DNS changes to propagate across the internet so you may need to come back and verify at a later stage.
The example above is for adding a TXT record to a domain in Fasthosts.
Note that your DNS is not always controlled through your domain registrar. When logged in to your domain name provider you may see a message about your nameservers pointing elsewhere. In this case updating your TXT record will not work.
Option 4 – Google Analytics
This is potentially one of the easiest methods of verifying your site ownership.
If you are the owner of your Google Analytics web property – or you are listed with edit permissions – then you can simply press the Verify option for instant verification.
Google may give you a verification failed message. If you receive one of the following reasons you have a problem with your Google Analytics installation. In these cases it is easiest to select a different verification option.
- The tracking code is malformed – there is a problem with your Analytics tracking code installation
- The tracking code is in the wrong position – it should be in the <head> section
- We weren’t able to verify your property – Google was unable to find Google Analytics tracking code on your website
If you receive one of the following verification failed reasons you have an issue with your Google Analytics account.
- The tracking code used by your site is not associated with your Analytics account – you need to be logged in to the same Google account as you are registered in Google Analytics
- You must have edit rights in this Analytics web property to use this verification method – you need a higher level of permission in Google Analytics (see below)

Option 5 – Google Tag Manager
Google Tag Manager is a tag management system that is typically used by organisations that wish to maintain multiple tags / tracking codes on their website without needing to edit the HTML code each time. A standard tag added within Google Tag Manager is Google Analytics.
If you are using Google Tag Manager click the Verify button to verify your site ownership.
If you receive the following verification failed message:
- We could not find any Google Tag Manager container ID on the index page of your site
you are not using Google Tag Manager or it is not installed correctly (ensure the <noscript> element is placed after the opening body tag)
If you receive the following verification failed message:
- You must have manage rights in this Tag Manager container
you need to have a higher level of permission in Google Tag Manger. Google Search Console suggests you must have the “manage” permission for the Tag Manager container but actually in v2 of Tag Manager the “manage” permission no longer exists. To verify site ownership you need to be an Admin on the Account (see below).

Site Ownership Verified
Once you have successfully verified your site ownership you will receive a success message and an email outlining ways to improve the search presence of your site.
You have now completed the process of Adding your site to Google Search Console.

Maintaining your Site Ownership Verification
Google will periodically re-check that you are verified to manage the site in Google Search Console. If it finds your verification method is no longer valid your access to the site in Search Console is removed. For example, if you verified using Google Analytics but no longer have edit permissions to the property in Google Analytics you will lose your verification in Search Console.
To avoid accidentally losing your verification status it can be beneficial to verify your site using more than one of the methods described.
hi
This is prabhu. i’m a web developer and i work with wordpress. your article is really good. its really helpful for the beginners to know how to add website on google search console. Thanku
Thanks for writing such a good article on Google Webmaster tool. I am looking to try these techniques for my website. Your tips are helpful for the person to make good blog marketing for their websites or blog. This content is so valuable and surely unique that people are happy and really helpful for them. there is no any other ways to get customers than Google indexing and Marketing and no any pressure from your side. Neither in the form of request nor hint or reminder in any ways.
Thanks
Very help full post, thank you (:
Hello I keep getting Verification failed for https://www.ekossi.com/ using the Meta tag method (1 minute ago). We were unable to connect to your server. please help
Your site doesn’t seem to be loading
It is fine now…it was a server misconfiguration
Thanks for sharing a very helpful post. Keep it continue!